Motivation and context
Most of the work I do as a mechanical engineer involves 3D modelling and I feel quite confident about this core competence, but I’m also aware of how vast this field is and how much I need to learn. Besides, engineering work mostly requires precision dimension modelling while there is a whole different kind of design revolving around organic shapes. I had a little introduction on this topic when I was asked to reproduce a physical object, a simple wooden statue of an head.
Ps: If you are wondering why a statue I can only say it was an experiment for a little batch production and I should introduce you to the amazing work of my uncle Gianfranco Fiore.
Challenges I faced
So, to put things clear, my goal was to recreate a 3D model of a complex physical object whose organic shape I wasn’t confident modelling with the tools I master to model mechanical parts and assemblies. Virtual sculpture wasn’t an option since I’m definitely not a 3D artist (not in spirit nor in competence) and I needed an exact virtual copy. The only path I felt confident following was that of 3D scan the object, but I hadn’t a proper tool.
Brainstorming
3D scanning was the only option I hadn’t discarded jet, it was technically feasible, but not within my reach with the tools at my disposal. Or at least so I thought at the beginning. A little bit of thinking remembered me of a technique I heard of the University during the courses on metal fatigue and experimental deformation analysis: Digital Image Correlation, or the study of multiple images of an object and the correlations between those images to extract useful informations. This same technique comes in handy when dealing with 3D scanning and it also has its own name: photogrammetry.
Research
Photogrammetry was a very promising option for what I had in mind since it required me only a camera, a computer to process the information (little spoiler, I was way too optimistic with those hypothesis) and obviously a suitable software. As a first thing I stated researching about the software because in 2020 (pandemic summer by the way) I was sure someone else has already developed and shared on the internet something way better than I could ever achieve by myself (I love tech and enjoy a bit of programming but I’m a poor, software naive, mech guy anyway). I immediately stumbled upon Meshroom and I immediately fell in love with it:
- first of all, it’s open source and I love open source
- second it’s as easy to use as upload a ton of images and it also tells you which one are good and which are bad while outputting a 3D model anyways
- did I already said it’s open source !?
I don’t want to spend time talking about the importance of getting the photos right because if the University taught me something is that however complex your model is, and whatever factor you keep into account, if you feed it bad input data for evaluation it is going to output bad solutions (garbage in, garbage out). Besides I’m no photo expert and the only advise I can tell is that of keeping the scene and lighting constant to let the software use background objects as track points.
What I found interesting to discuss instead is the computational effort. Despite my initial optimistic predictions, my old laptop was not able to full fill the task at all. Fortunately the same company who probably brought you to this blog also offer an interesting supercomputer service called Google Colab. Colab is essentially a virtual machine in some part of the Google servers which allows you access to powerful CPUs and GPUs for computation, mainly for Machine Learning purposes, but nothing has stopped me from downloading Meshroom inside it and performing the computation.
Useful lessons I learned
This little project gave me the opportunity to investigate on photogrammetry, but also on the useful Google Colab service, both tools which could come in handy in the future. On the following the code I used to perform the needed calculation using the Meshroom software:
# you can connect this notebook to your Google Drive by using this code:
from google.colab import drive
drive.mount('/content/drive')

# upload the files from drive to the Colab VM
!unzip -uq /content/drive/My\ Drive/dati_CoLab/set4.zip -d /content

# get Meshroom
# you have to install it for every instance of CoLab since your VM is not permanent
!wget -N https://github.com/alicevision/meshroom/releases/download/v2019.1.0/Meshroom-2019.1.0-linux.tar.gz
!mkdir meshroom
!tar xzf Meshroom-2019.1.0-linux.tar.gz -C ./meshroom

# launch the calculation
!mkdir ./object_out
!./meshroom2/Meshroom-2019.2.0/meshroom_photogrammetry --input ./set4 --output ./object_out

# zip and download the results
!zip -r meshobject_set4.zip ./object_out
!mv ./meshobject_set4.zip ./drive/My\ Drive/dati_CoLab/meshobject_set4.zip

# recover project and output files to open them in your local desktop application
!zip -r meshobject_set3.zip /tmp/MeshroomCache
!mv ./meshobject_set3.zip ./drive/My\ Drive/dati_CoLab/meshobject_set3.zip
!mv ./ric3.mg ./drive/My\ Drive/dati_CoLab/ric3.mg
 |
 |
|---|---|
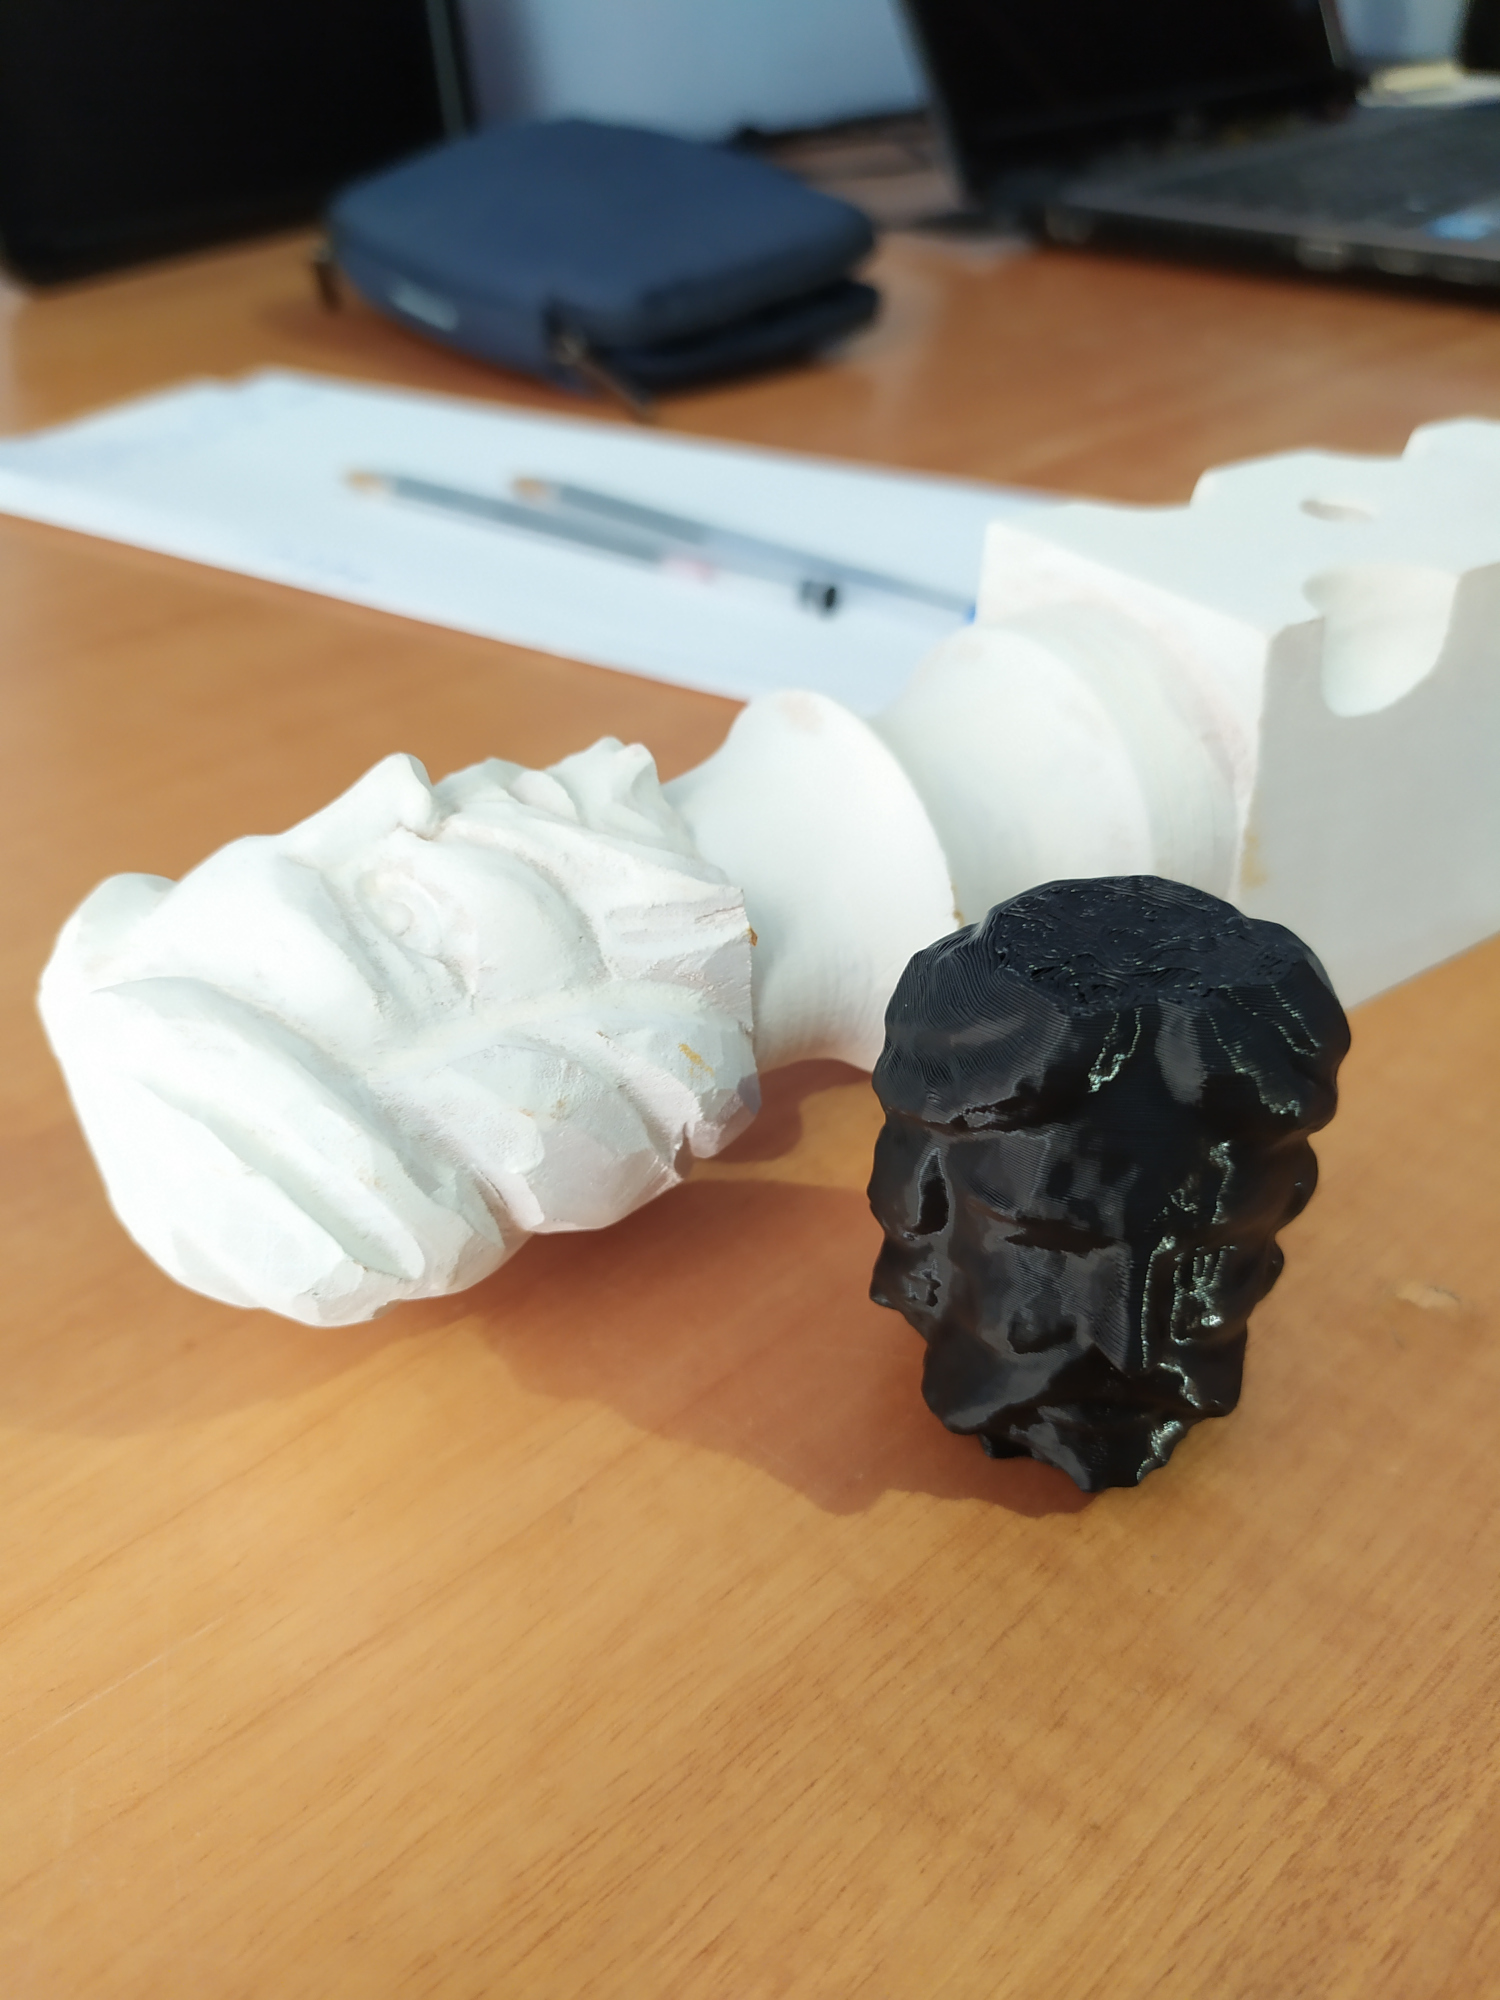
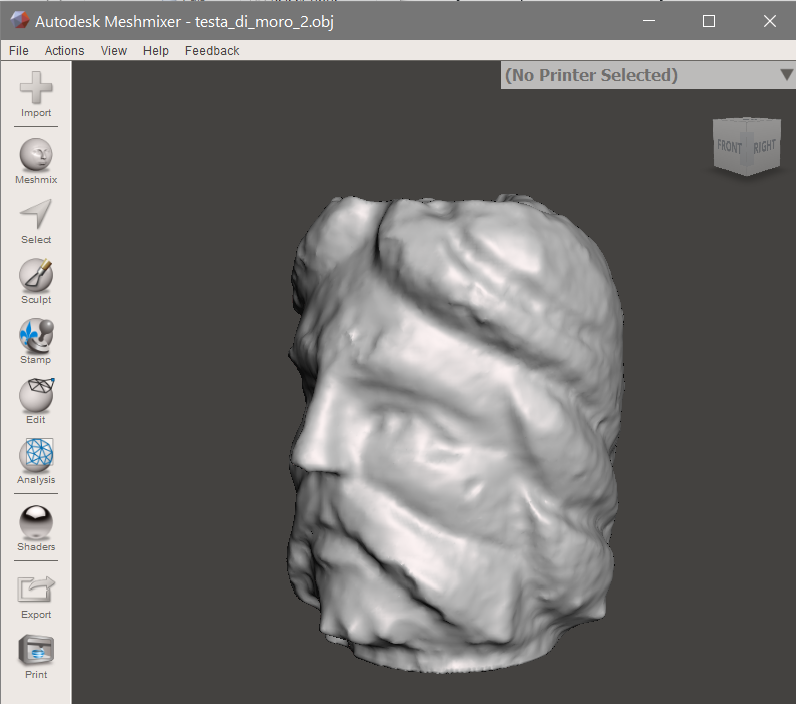
| Physical object and 3D print | 3D model |
That’s it! I hope this information would be of any interest to anyone facing my same challenge!